Efficiency is one of the keys to an effective CRM. People need to be able to do their jobs with the least amount of work possible. The new Outlook App for Dynamics 365 v9 is a great tool to help customer service people work more efficiently. The feature that I will be discussing today involves a way to create a case from an email directly within Outlook, eliminating the need to work separately in your web browser.
Consider the scenario in which a support request is sent from a customer via email. We need to enter this as a case in CRM, and this email should form the basis of the case that we will create.
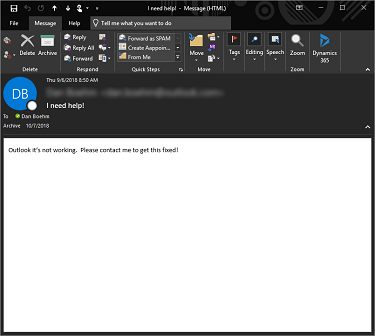
STEP 1
The first thing we want to do is click on the Dynamics 365 button in the ribbon at the top right corner of the window.
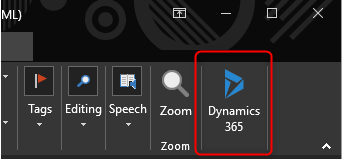
This will open the Dynamics 365 App within the Outlook window. The system will automatically find a matching email address within your CRM database and bring up that person’s contact record.
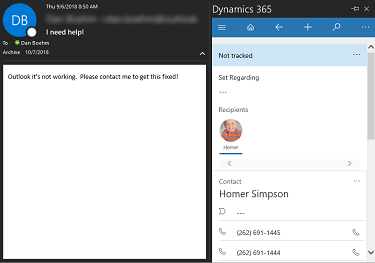
The Dynamics 365 window shows the Outlook app contact form. This form is customizable which means that you can add or remove fields or subgrids to see exactly what you need to see. In this scenario, we have customized the contact form by adding the cases subgrid. If you scroll down, you will see a list of cases for this contact.
STEP 2
We can create a case directly from this subgrid by clicking on the ellipsis button to the right of the word Cases and choose Add New Case.
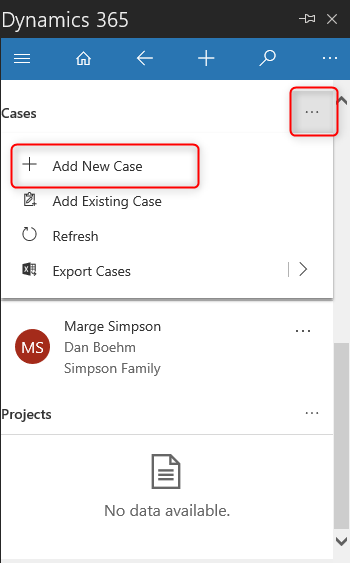
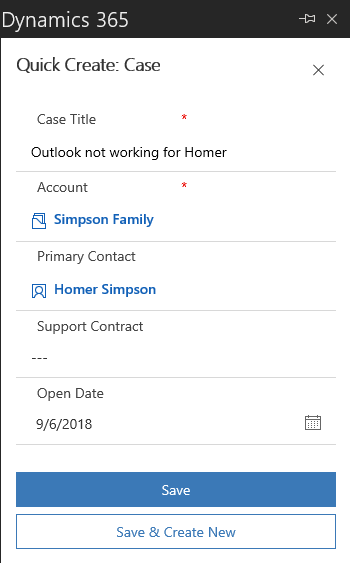
This is great because it brings up our Case Quick Create form.
STEP 3
From here we can enter a title for our case and populate any other information needed to create this case. This is the Case Quick Create form, so it is fully customizable. Customize this form to show only the fields that you need to see. Click Save and the case will be created. The new case will show up immediately in the cases subgrid.
STEP 4
Our case has been created with hardly any effort at all! The last step is to link the email message itself to the case that we just created. To do this, find the cases subgrid again and click the ellipsis next to the case name and choose Set Regarding.
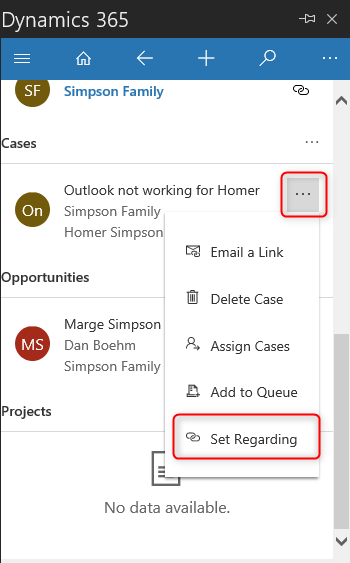
That’s all! We’ve now created a case and the email message has been linked.
REVIEW
Four simple steps! That’s all it took to create a case from an email directly inside of Outlook. There was no need to stop, log into CRM, look up the contact, and create the case. With the Outlook app, Microsoft has streamlined this process to significantly increase user productivity.
The beauty of this system is that almost all screens are configurable, so you can customize this operation to meet your needs. You can customize the contact form to show a list of cases, and you can customize the Quick Create form with fields that pertain specifically to your needs. What’s more is you can create Opportunities or even Projects (a custom entity) from an email using these same steps.
TopLine Results specializes in CRM platforms and finding efficient solutions to problems, including making your CRM more friendly, so that your team members use it consistently. Customizing not only your web-based CRM system but also your Outlook interface can have a dramatic effect on your team’s productivity, which will, in turn, have a positive affect on your bottom line! Contact us today to find out more about how the Outlook app can assist you and your team! 1-800-880-1960 or info@toplineresults.com .
About the Author
Dan Boehm is our senior developer and lead engineer for CRM implementation projects. With more than ten years of Microsoft .NET and CRM experience, Dan specializes in complex CRM development and migration projects with an emphasis on creative solutions which meet and surpass client expectations.
You must be logged in to post a comment.