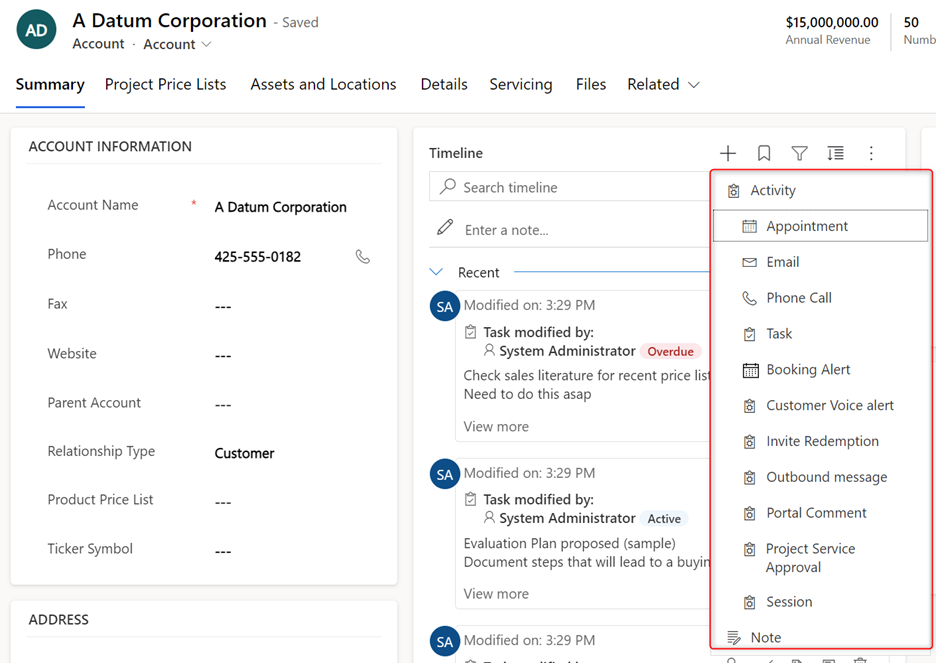
Hey, Dynamics 365 enthusiasts! Let's face it, managing customer engagements is thrilling, but the sheer multitude of activity types lining up on your timeline is not exactly a party.
In this blog, we're diving deep into the world of customization, exploring how you can transform your Dynamics 365 Customer Engagement experience. We're tackling the challenge of overwhelming activity types head-on, showing you the ropes on how to give your timeline a makeover by cleaning up the list of activity types available when clicking the plus button. Get ready to level up your user experience, make things efficient, and turn that clutter into a well-organized digital oasis that suits your style.
Navigate to the Power Platform Maker Environment
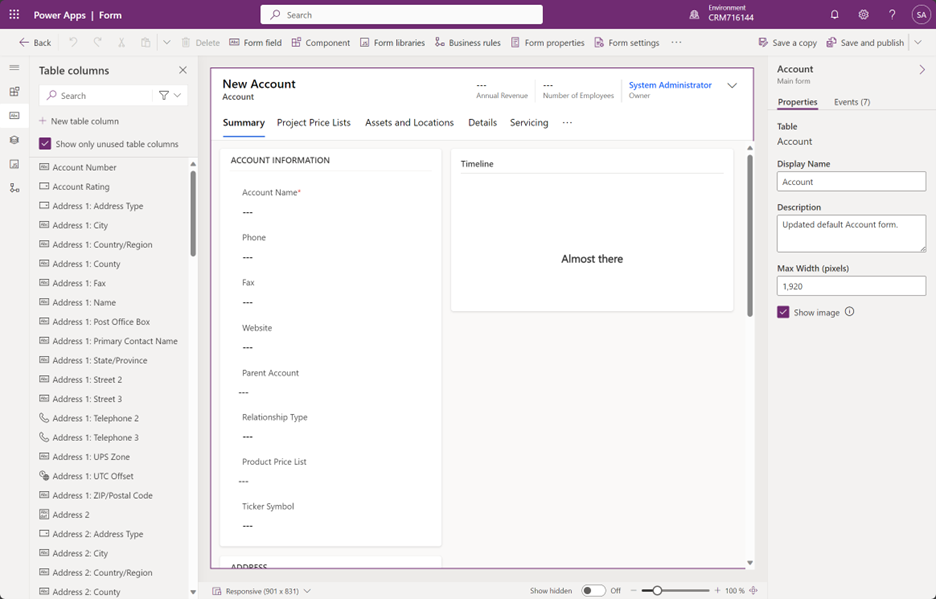
Alright, let's kick this off! We're diving into the heart of Dynamics 365, the Power Platform. Imagine it as the backstage pass to your CRM world.
The first thing you need to do is sign in to the Power Platform maker environment and edit your main account form. Your screen should look something like this.
Access the Timeline Control Properties
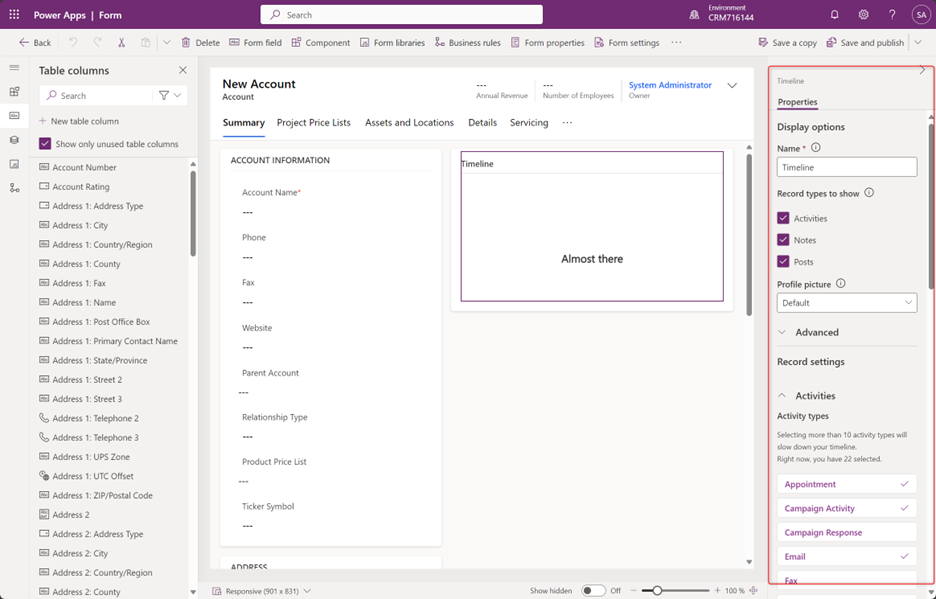
Now, let’s open the hood and peek at the timeline control properties. It's like checking out the engine of your CRM, understanding the gears that make things tick.
Locate the timeline control and click on it. You’ll notice that the properties page on the right side of your screen now gives you many options to customize how this works.
Customize the Timeline Control
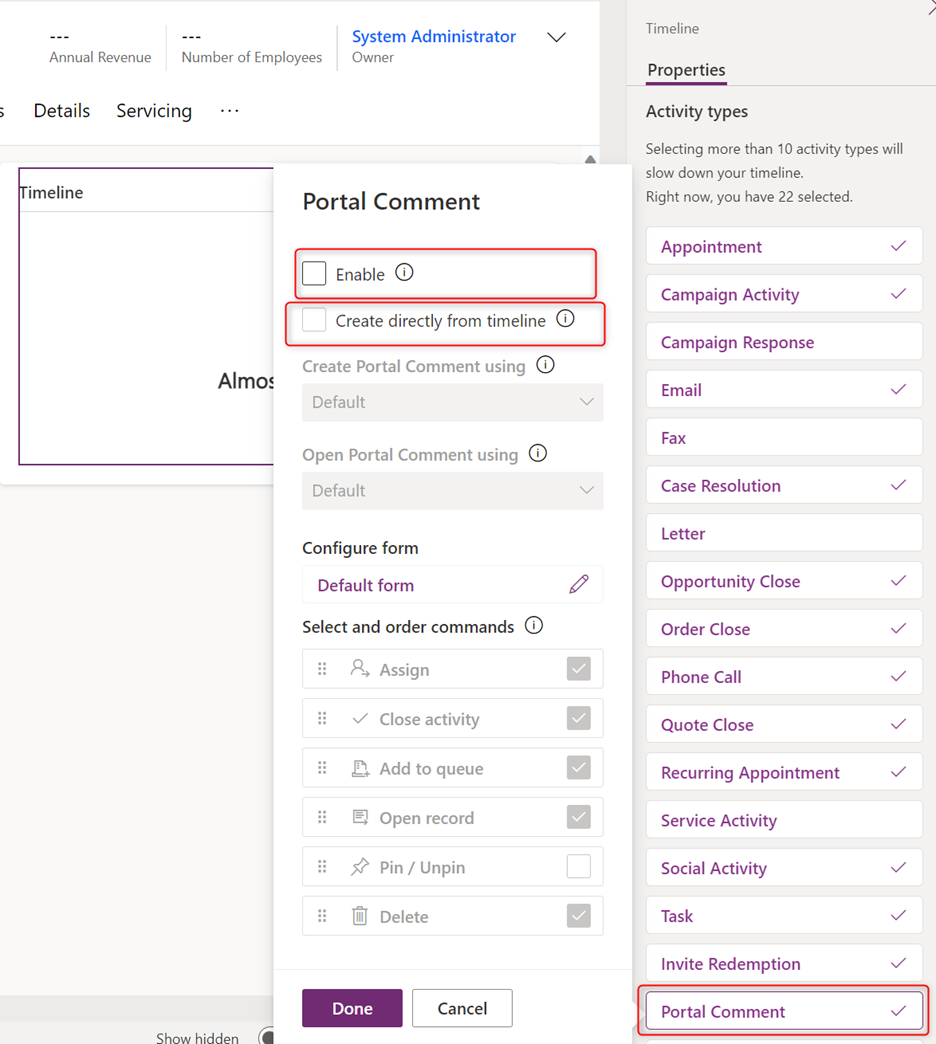
It’s time to curate your CRM experience! We're adding a bit of personality to the timeline control by customizing the activity types. Think of it as creating your dream playlist for the CRM party.
Let's take a stroll to the activities area. There, you'll find a lineup of activity types, some with checkboxes and some without. A checkbox means that this activity type will appear in the timeline. No checkbox? Well, that activity type won't make the timeline stage. Dive into an activity type, such as portal comment. You'll see it's not just enabled, but the option is checked, giving users the power to create this activity directly from the timeline. Uncheck that box if you want to keep users from having that option. And if you're thinking, "No portal comment records on my account timeline, please," uncheck the Enable box too. Let's keep it clean and exactly how you want it!
Publish your Changes and Check it Out!
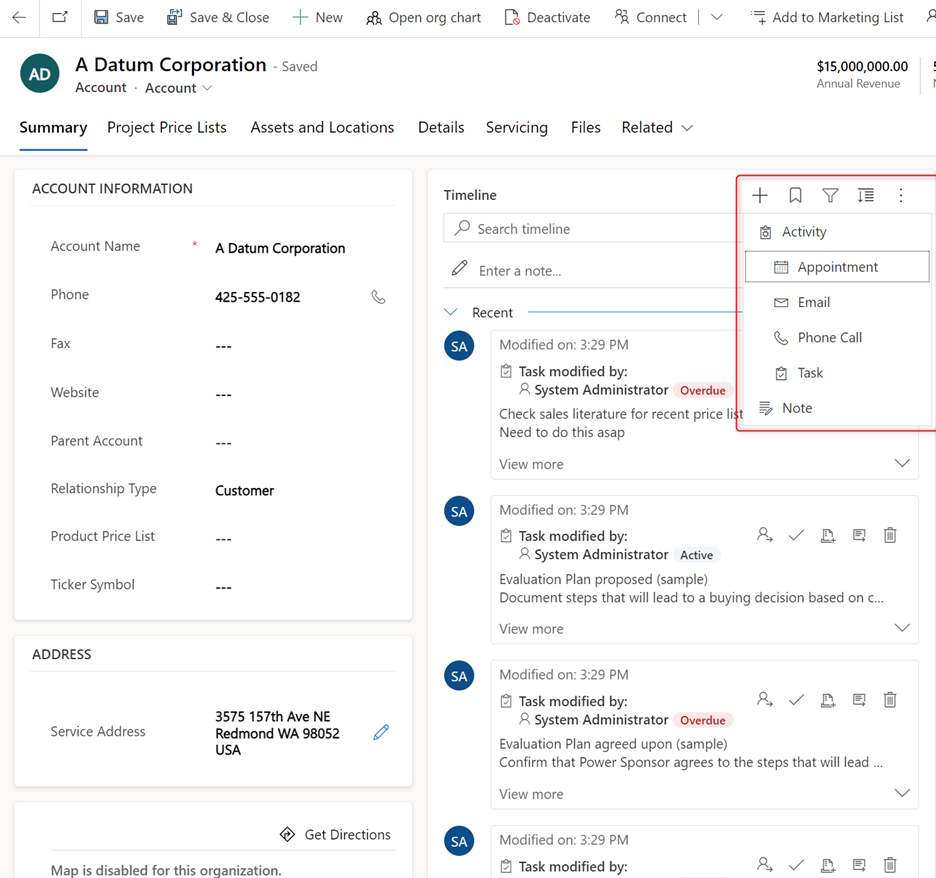
The moment of truth! You've customized your timeline, and now it's time to hit that "save and publish" button. It's like sending out invitations to your CRM party; everyone's invited to experience the new and improved CRM experience.
What a difference that makes! Users will no longer have to navigate a cluttered list when they need to add a new activity.
We’ve just experienced a journey through the Dynamics 365 customization wonderland! Navigating Dynamics 365 doesn’t have to feel like an impossible mission. By decluttering your account form timeline, you're not just tidying up; you're making your CRM experience smoother, faster, and more aligned with your unique needs. It’s your CRM. Let’s make it work for you, not the other way around! As you step into this revamped Dynamics 365 world, get ready to embrace efficiency and a user experience that feels tailor-made just for you.
Contact TopLine Results at 800-880-1960 or email info@toplineresults.com for more tips and tricks to help you get the most out of your Microsoft Dynamics 365 experience.


You must be logged in to post a comment.