Lightning for Outlook Blog Series
In the last Lightning for Outlook blog post, I talked about creating Contacts and Accounts in Outlook in one motion. If you're catching up on the series, check out this post to see one of my favorite Salesforce magic tricks. If you're already caught up, get excited because by the end of this blog you'll be creating Opportunities without leaving Outlook!
Creating the Opportunity
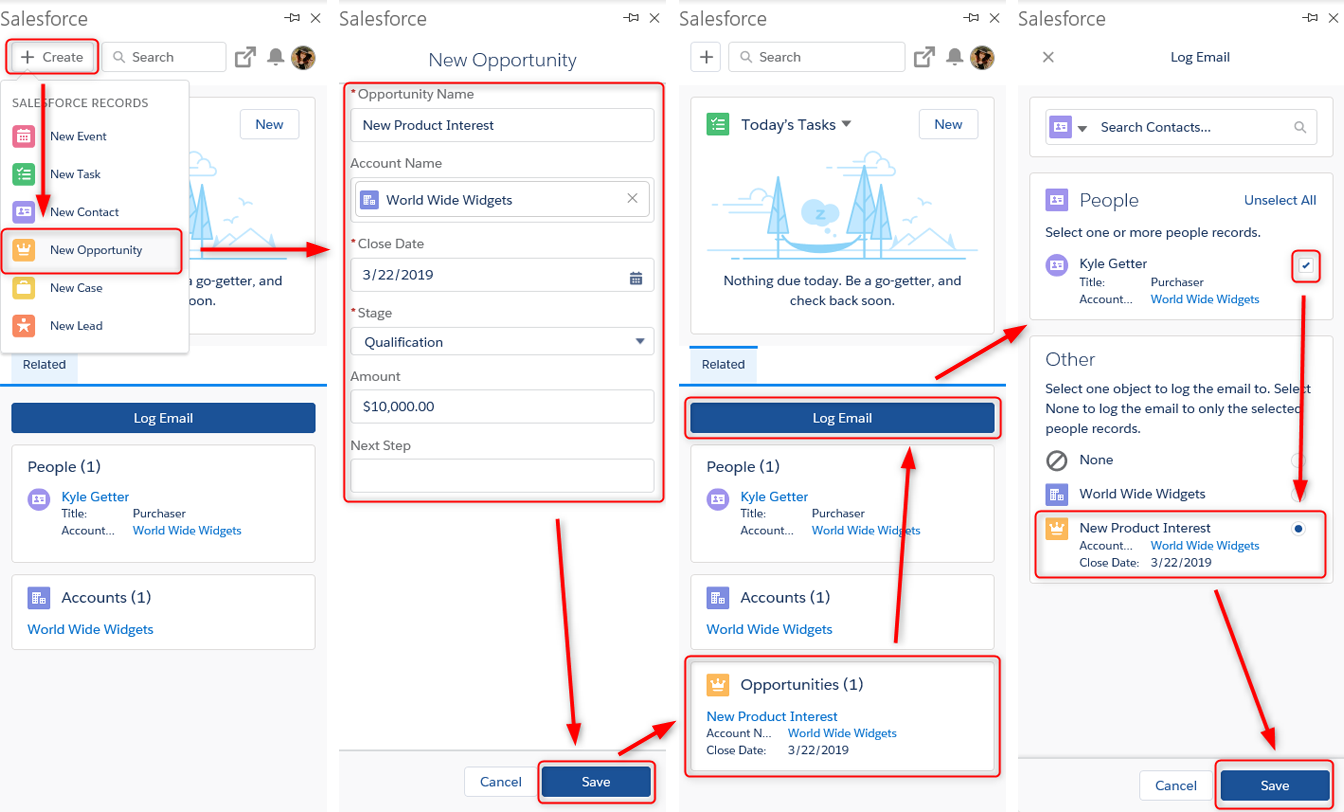
Now that you've got an Account and a Contact with a new potential opportunity, find the email with the new opportunity and open the Lightning for Outlook component. From here, you can see there are no Salesforce Opportunities related to Kyle Getter, so we will create one. To do this, click "Create" at the top and choose "New Opportunity". If you're not seeing this option, talk to your Salesforce Administrator. In the Create Opportunity screen, the Opportunity Name will match the email subject. You can rename this if you'd like. Enter in the necessary information about the Opportunity and click "Save".
Logging the Email
Once the Opportunity has been created, you'll see it appear in the "Opportunities" section of Lightning for Outlook. Click "Log Email" after you have verified that the Opportunity exists. On the next screen, choose the records to which you want to “relate” the email. In this example, we'd like to relate the email to the Contact who sent the email: Kyle Getter. Check the box next to Kyle's record to relate the email. In the "Other" section, we can choose one additional record to relate the email. Since this email is strongly related to the Opportunity, let's click the circle next to the Opportunity record. Lastly, click "Save" at the bottom of the screen to relate the email to both selected records.
Choosing the "Other" Related Record
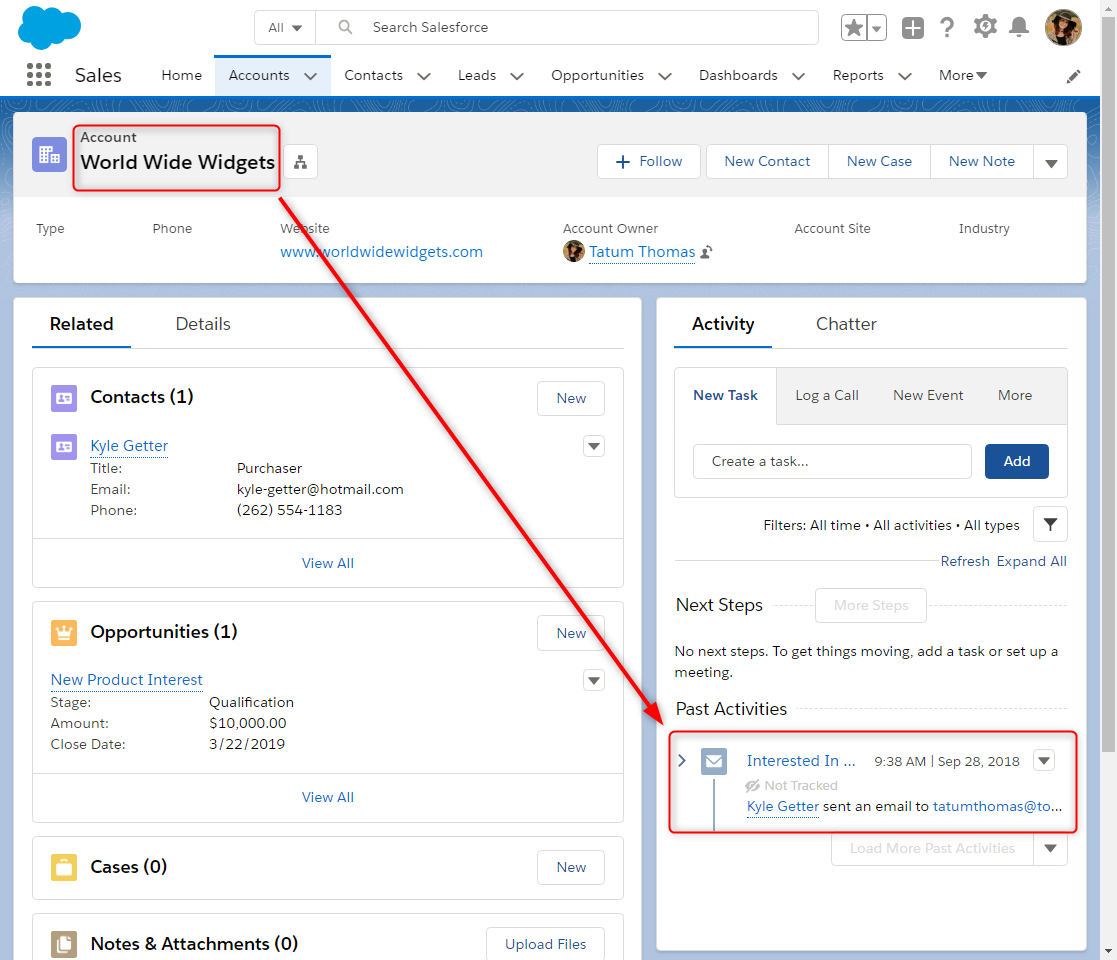
If you're familiar with Salesforce, you may know that records "roll up" to the highest parent object. Our Account record is considered a "parent" record because it has many other related records under it, such as Contacts. This means that because Kyle Getter is a contact in the World Wide Widgets account, any Activities related to Kyle will also show up in the Activities panel on World Wide Widgets. Because of this, we can directly relate the email to the Opportunity and we'll be able to see it on the Account record. If we view the Opportunity record, the email will be there (directly related). If we view Kyle's record, the email will be there (also directly related). And if we view the Account record, the email will be there (indirectly related because it is "rolled up").
Tying It All Together
If you've followed along, then you've created an Opportunity, Contact and Account in Salesforce without leaving the Outlook window. If you haven't followed along, then you've still got a great resource for when you're ready to take on this magic and become more efficient when using both Salesforce and Outlook. Lastly, you should have a good understanding of "rolled-up" records and a good method for choosing that "other" related record.
If you're unsure about this magic, have questions or just need a one-on-one walkthrough, give us a call at 1-800-880-1960 or contact us at info@toplineresults.com. We’d like to unlock some CRM magic for you and your team!


You must be logged in to post a comment.