When searching for a company record, you may find that the account has been entered twice. Which one is most accurate, and where should you enter new data? Stop! Don’t enter any additional information until you merge the duplicate records.
Merging records is an easy process that allows you to consolidate any notes and contact records associated with the accounts. Here are the steps:

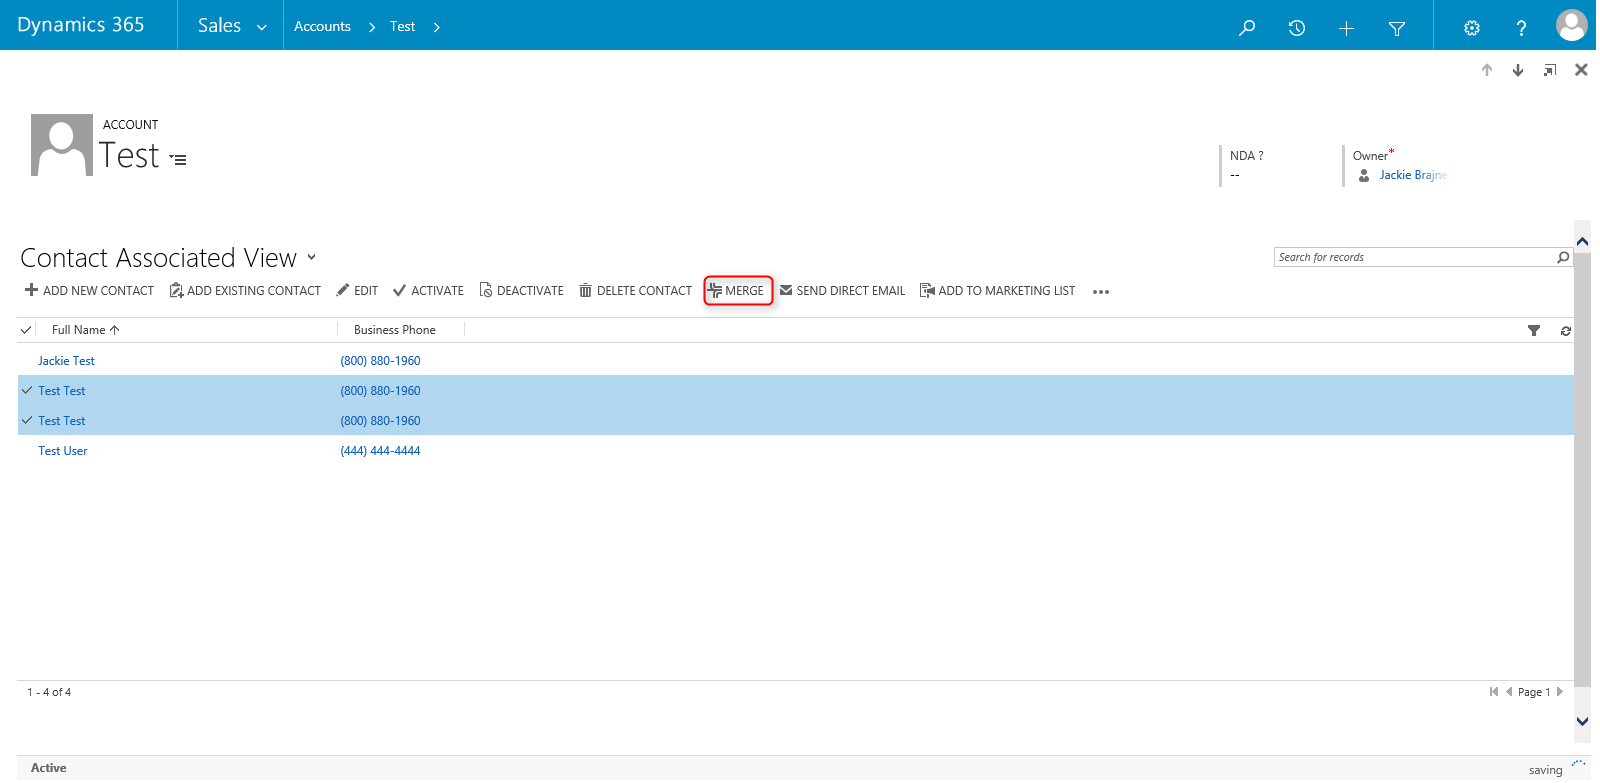
First, select the two accounts that you would like to merge. After selecting two accounts, the option to merge becomes available. (Note: You can only select two at a time. When there are three records, you must merge two of them, and then merge the final record with the one created from the previous merge.)

Once you select merge, you will be directed to the following screen.
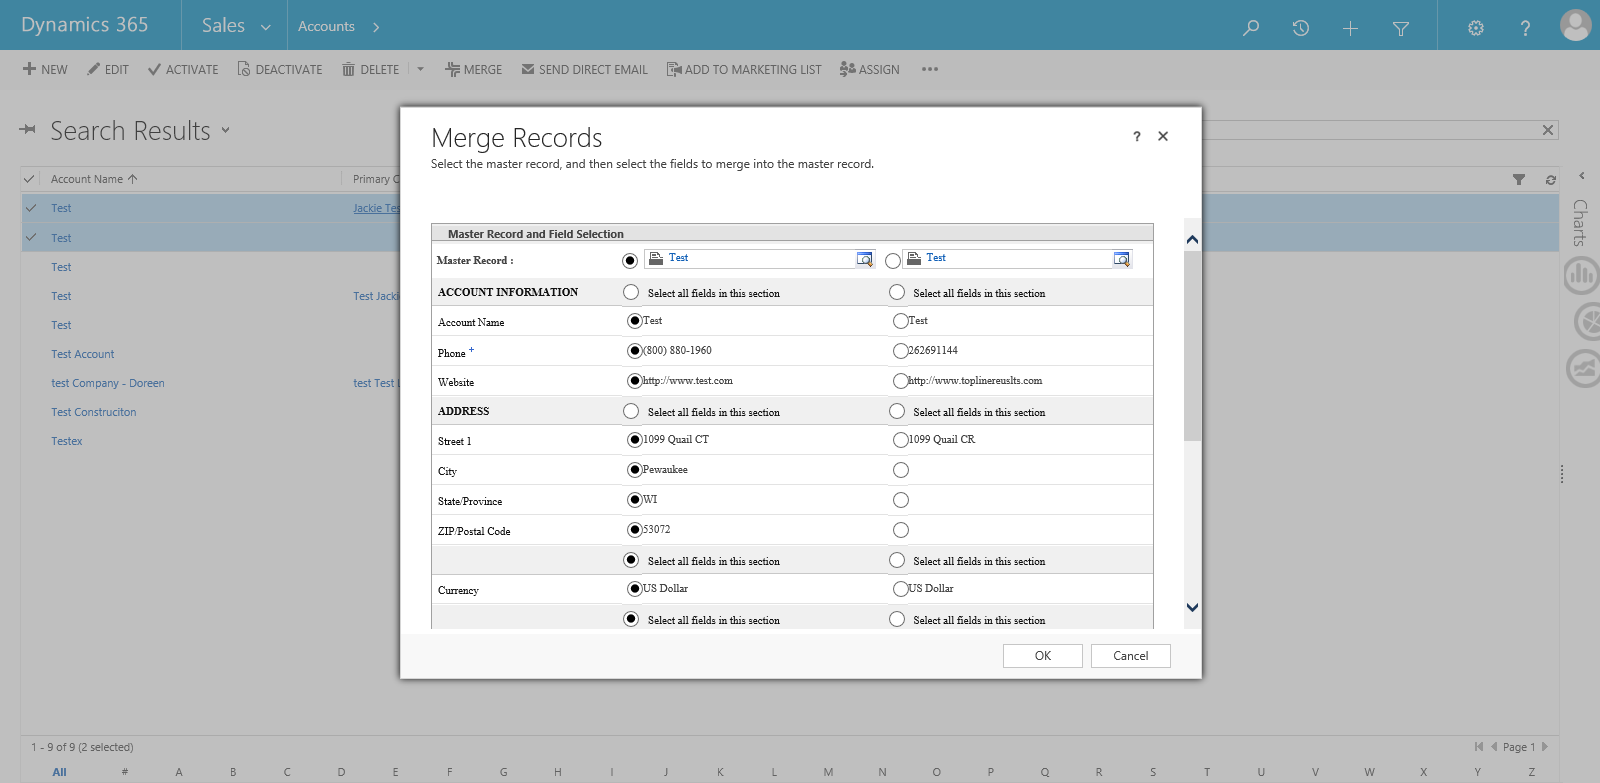
Select the fields that are most accurate for the customer, then click on ok. You will see a pop-up that states: Merging records…please wait. Once completed, the following dialog box will appear.

You have now successfully merged two accounts!
This process can also be used for contacts; simply follow the same directions.
Please remember, to avoid duplicating records, always search the database with (*) to look up all accounts, contacts and leads prior to adding a new record.

If you need further assistance with de-duping your database, contact us at info@toplineresults.com.
About the Author
Lexi Miller is TopLine Results Corporation's Office Manager and provides support for Act! and Microsoft Dynamics 365. Lexi is a ClickDimensions Certified Professional.
You must be logged in to post a comment.