In our last Lightning for Outlook blog series post, I covered what Lightning for Outlook is, how awesome it is and how to get it. If you've gotten Lightning for Outlook installed, you're ready for this blog post! If not, check out the last post or reach out to your Salesforce Admin for assistance.

As a quick disclaimer, I want to remind you that I'm really not a magician…but there is a better way to create an Opportunity, Contact and Account without switching back and forth between Salesforce and Outlook. In this post, we'll cover Creating an Account and a Contact. First, we'll start with Creating a Contact…
Identifying Contacts
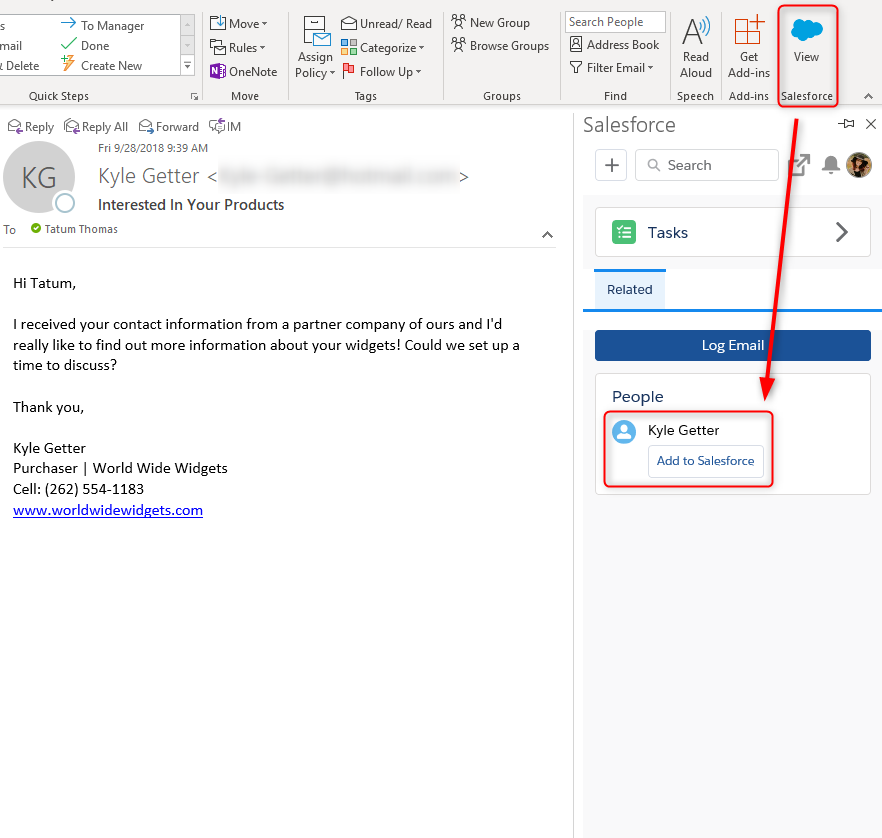
Here's our email from Kyle Getter, a new Contact. We can tell he's not in our Salesforce organization yet because when we open the Lightning for Outlook app (cloud icon in ribbon), we can see his name, but it's followed by the "Add to Salesforce" button. Not only will Salesforce show the sender of the email, but it will also show anybody who was in the CC field as well.
Creating the Contact
From here, adding Kyle to our Salesforce org is a breeze! Just click on the "Add to Salesforce" button under the Sender's name in the Lightning for Outlook side panel. From here, you can choose to create your sender as a Contact or a Lead in Salesforce.
Admin tip: You can customize this to create contacts of a specific record type as well!
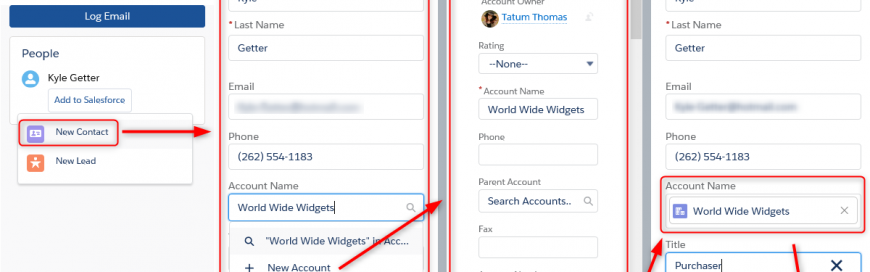
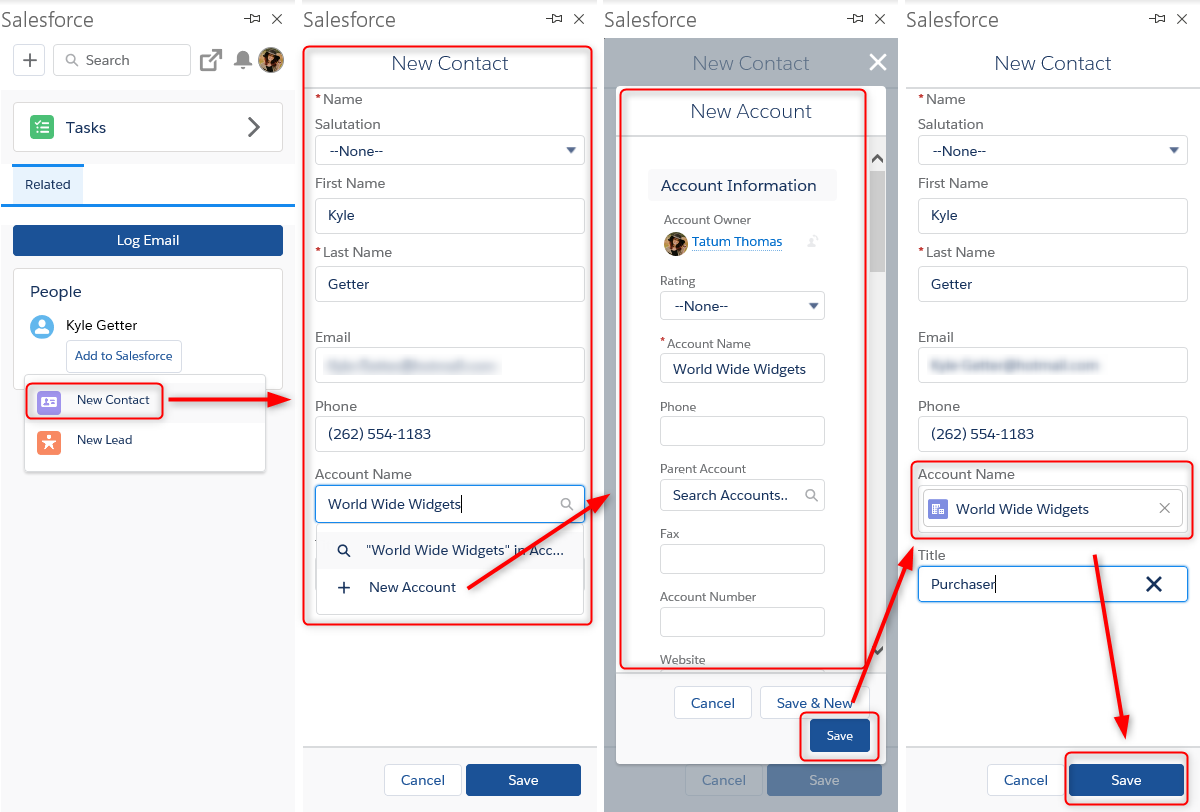
From here, you'll see that Kyle's first name, last name and email are all filled in. We can quickly add his phone number and title as we have those from his signature.
Creating the Account
Next, we'll follow data best practices and double check to see if “World Wide Widgets” (Kyle's company) is already an Account in Salesforce. Entering "World Wide Widgets" in the Account Name field isn't yielding any results so we know we need to create an Account.
Spoiler Alert: We don't need to back out of the New Contact screen to be able to create a new Account! In the Account Name lookup field, just click on the "+ New Account" item! Enter in the information that you have on the Account and click "Save" when you're done.
Final Steps
After clicking save, the Lightning for Outlook app will bring us back to the "New Contact" screen that we were in previously. We can see that the Account Name field has now been populated with the World Wide Widgets account that we just created. Once you've added all of the necessary contact information, click "Save".
VOILA! A new Contact and a new Account have now been created oh-so-effortlessly thanks to the awesome Lightning for Outlook tool. Stay tuned for the next post in the blog series where I'll continue the magic by covering the steps to create an Opportunity from an email!
To make the magic of Salesforce and Outlook work for you, give us a call at 1-800-880-1960 or contact us at info@toplineresults.com.
Leave a comment!
You must be logged in to post a comment.