
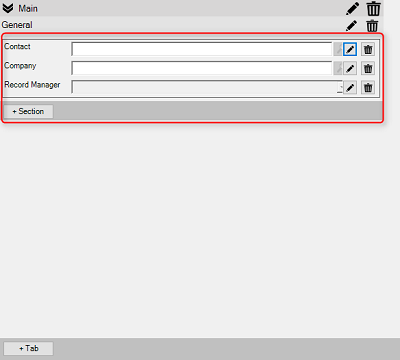
Changing the Number of Columns in a Custom View
To change the number of columns you want in your TopLine Designer, follow the steps below:
Select Tools -> Design Custom Tables
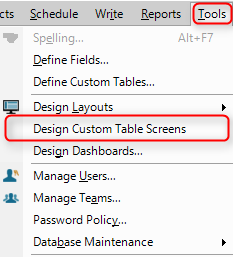
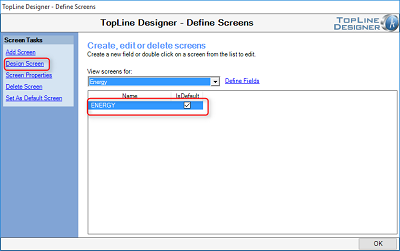
Select the table to be modified.
On the left side of the select Design.
To add a column, click on the pencil under the section name.
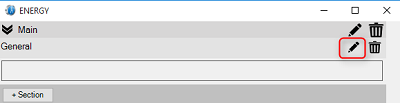
To add a column, click on the pencil under the section name.

Adding a Field to a Custom Table
To change the fields in your TopLine Designer, follow the steps below:
Select Tools -> Design Custom Tables
Select the table to be modified.
On the left side of the view select Design.
A new window will open with all the fields that are available to be added to the custom.
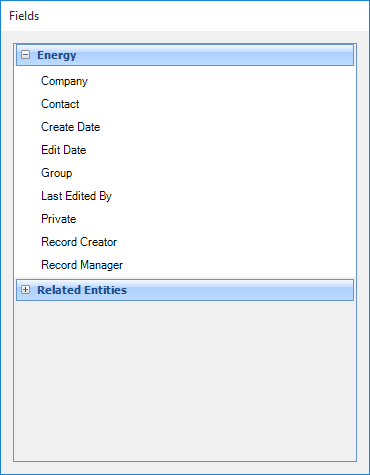
Click and drag the field to be added to the custom layout.
Place the field on the layout where you would like it.
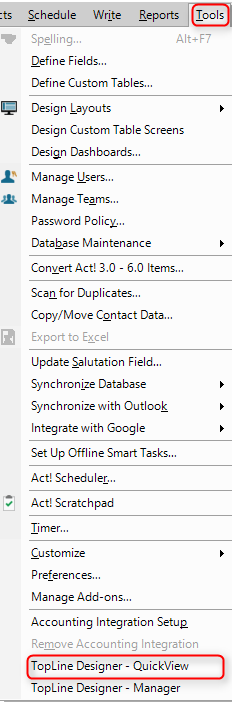
How to Add Custom Tables to Entities
To add a tab to an entity (contact, company, group, opportunity or list view), at the top of the window select Tools -> TopLine Designer – QuickView.
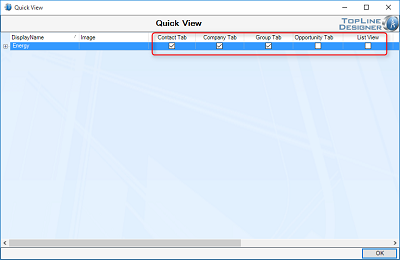
A new pop up will open which allows you to select to which entity you will add the tab.
Click the check box for the selected entity and click OK.
You can select multiple entities.
For more tips on using TopLine Designer, visit our Youtube channel.
Leave a comment!
You must be logged in to post a comment.